Hot Article
- Centos7 closes and restarts the system firewall and opens firewall ports
- How IID server uses Xshell to connect to Linux (centos) server
- BT panel forgets the background login URL, and the solution to the security entrance verification failure
- What to do if a cp: omitting directory error occurs in Linux (detailed solution)
- How to change pycharm to Chinese (pycharm set Chinese detailed tutorial)
- Error connecting to MySQL: Cant connect to MySQL server (10060)
How to build a website on a cloud server? Practical construction of video website graphic tutorial
- Author:Sven
- Category:Website building
- Release Time:2023-03-13
Hello everyone, today I will teach you how to build a film and television website using cloud virtual host. This tutorial uses Apple CMS system to build.

Screenshot of film and television website
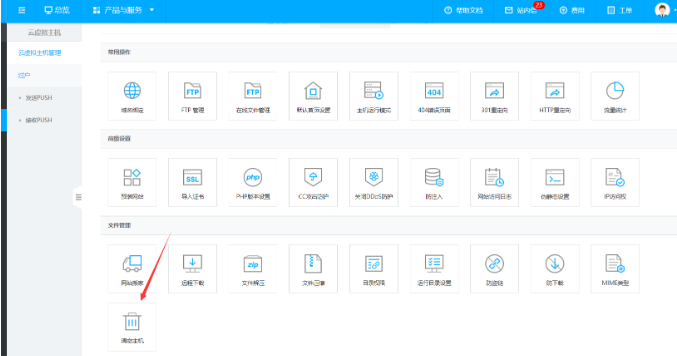
Empty virtual host
Before starting to install the website, clear the virtual host first. Because after the virtual host is opened successfully, there will generally be a default web page file, which can be cleared by directly clicking the Clear Host button under the virtual host control panel.
Modify PHP version
Since the minimum operating environment requirement of the Apple CMS system is php7.0 + MySql5.6, all matters need to change the php version of the virtual host to php7.0+. Here I take Jiulingyun's virtual host as an example, enter the virtual host control panel, then find the php version setting button, and follow the prompts to set the php version to php7.0.
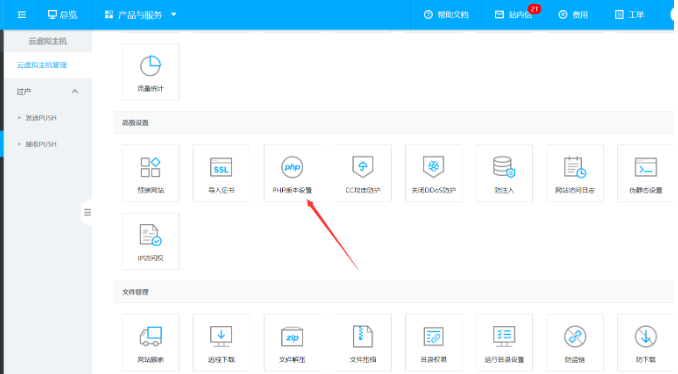
Virtual Hosting Control Panel

Switch the corresponding version number
Source code upload
Upload the Apple CMS source code to the wwwroot directory of the cloud virtual host through a compressed package, as shown below:
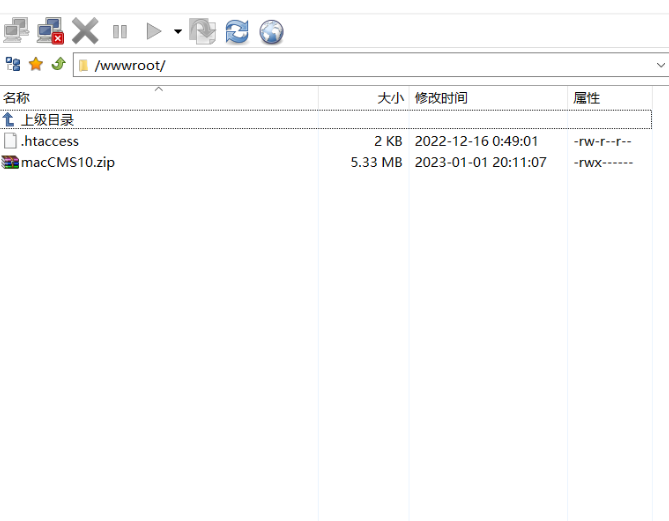
Upload the source code to the main directory of the virtual host
Source code decompression
Because what we uploaded is in compressed package format, it cannot be run directly in the virtual host, so we need to decompress the source code. We use the file decompression function in the virtual host control panel, and then select the decompression directory of the compressed package just uploaded and select wwwroot.
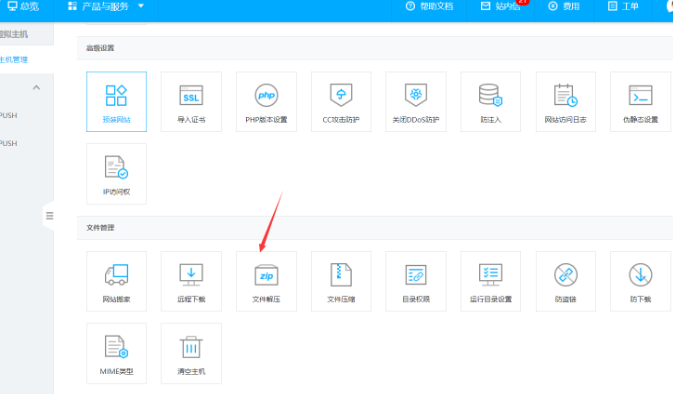
The decompression function of the virtual host panel
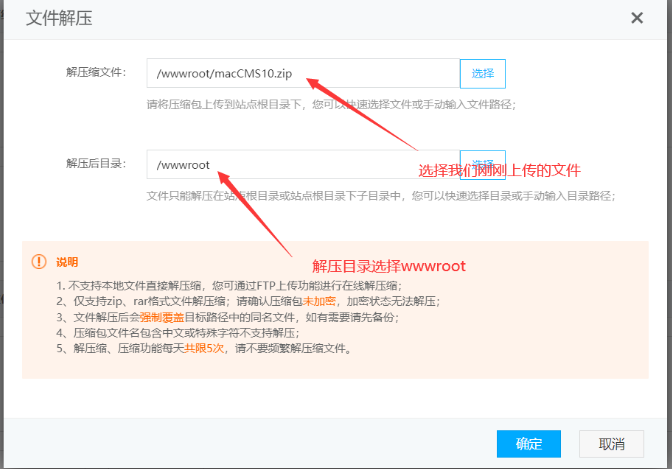
Select the corresponding file to decompress
Start installation
After clicking the file to decompress and confirm, you need to wait for about 5 minutes, then you can copy and paste the domain name you bound to the browser to access. If you have not bound the domain name, you can use the temporary Paste the domain name into the browser, and it will automatically jump to the installation page of Apple CMS.

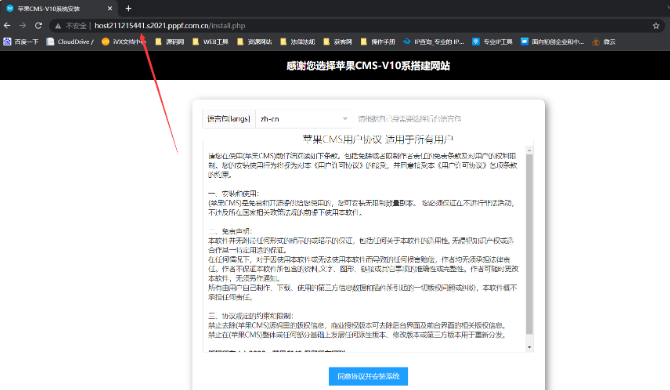
Apple CMS installation page
After entering this webpage, click to agree to the agreement, and then continue to the next step until you enter the database installation interface. Fill in the database information in the virtual host control panel into the corresponding input box on the installation page. (Note: The server address needs to fill in the intranet IP of the database)
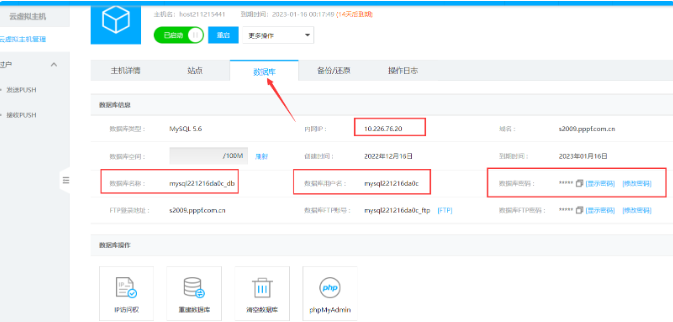
Copy the database information of the virtual host panel
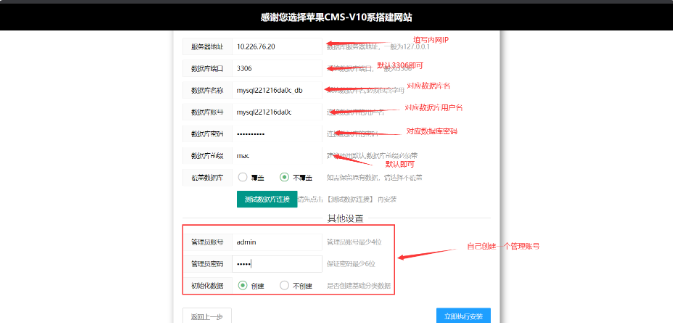
Enter the corresponding database information
Then set an administrator account password by yourself, which will be used to log in to the background of Apple CMS. After the input is complete, you can click Install Now. After the installation is complete, it will jump to the background login page, enter the newly created administrator account to log in to enter the website background.
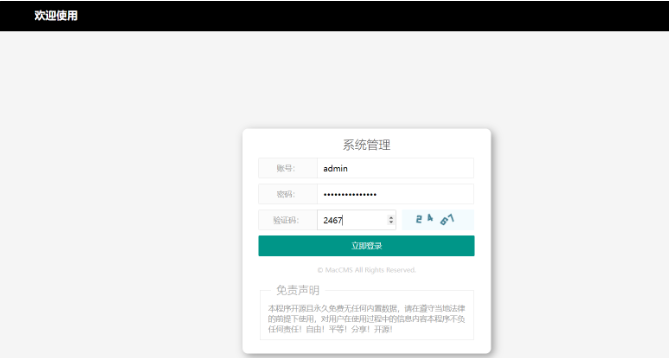
Enter the account password you just set to log in
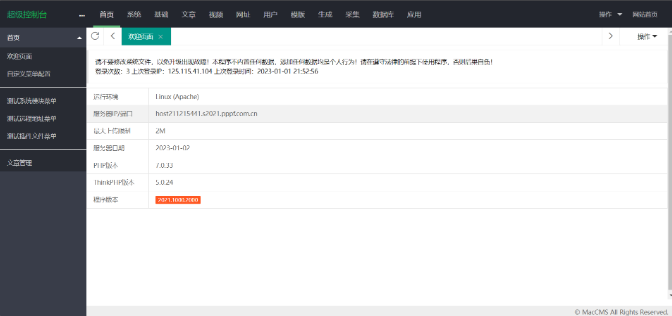
Apple TV website management background
Installation complete
At this point, you have successfully installed the Apple CMS system, and you can upload videos in the background, or use the collection function to collect video data in batches. If you want to make your website look good, you can search for the templates of the Apple CMS system on the Internet by yourself, and you can use the templates to make your web pages beautiful
related topic
- Quick tutorial on building a website using the pagoda panel
- How to build a website on a cloud server? Practical construction of video website graphic tutorial
- IDGlobal teaches you how to create folders in node.js
- How to import the SSL certificate (pfx) and how to bind to the specified website.
- BT panel forgets the background login URL, and the solution to the security entrance verification failure
- centos7 Pagoda linux panel installation tutorial (novice)